How to Set Up the "Try It" Sample Programs
In that the purpose of the next several topics is to explore the basics of the language, the GUIs for the sample programs presented in those topics will be quite minimal. The sample programs in those topics (which will be referred to as "Try It" programs) will use only the InputBox function for input, the form itself for output, and command buttons for the processing. The form will be used to more or less simulate terminal screen output (similar to the "old days" of DOS-based BASIC). Be aware that most VB applications do not print output to the screen in this manner; future sections will focus more on GUI techniques.
The following example can be used as a model for all examples presented in this section. It is recommended that you save this sample program in its own folder (for example, you might call the folder where you save the sample project below "VBTut-03-01"). You can then copy this folder over to another folder for each subsequent "Try It" sample program. When you open the new, copied folder to do the new example, the basic structure for the program will be there, and you can concentrate on modifying the code behind the "Try It" command button.
- Start a new "Standard EXE" project in VB
- Set the following properties of the form:
Property Value
(Name) frmTest
Caption Test
AutoRedraw True
Font Courier New
- Place a command button on the form and set the following properties:
Property Value
(Name) cmdTryIt
Caption Try It
- Place a second command button on the form and set the following properties:
Property Value
(Name) cmdClear
Caption Clear
- Place a third command button on the form and set the following properties:
Property Value
(Name) cmdExit
Caption Exit
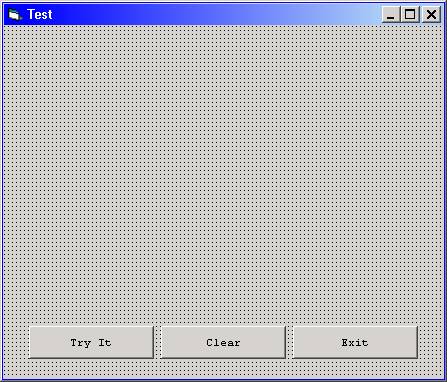
- Place the command buttons toward the bottom of the form, center them horizontally on the form and set their horizontal spacing equal. Your form should look like this:
- Double-click the cmdClear command button and place the single statement Cls in the cmdClear_Click event:
Private Sub cmdClear_Click()
Cls
End Sub
- Double-click the cmdExit command button and place the single statement End in the cmdExit_Click event:
Private Sub cmdExit_Click()
End
End Sub
- Double-click the cmdTryIt command button and place the following code in the cmdTryIt_Click event:
Private Sub cmdTryIt_Click()
Dim strName As String
strName = InputBox("Enter your name:", "Input Test")
Print "Hello there, "; strName
End Sub
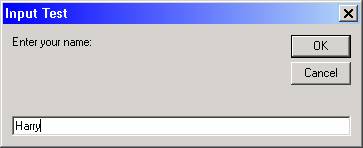
- Run the program and click the "Try It" command button. The input box will appear. Type your name in the data entry area and click OK:
- The output (as a result of the Print statement) will be displayed on the form:
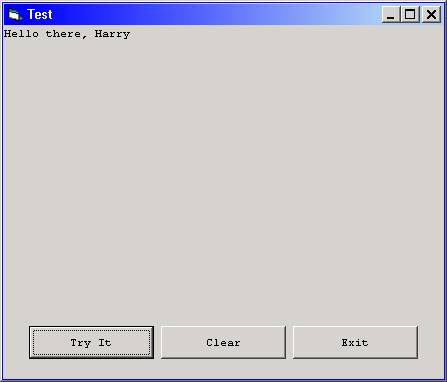
- Pressing "Try It" repeatedly will cause the output to be repeated on successive lines. Pressing the "Clear" button will clear all the output. Pressing the "Exit" button will exit the program and return you to the design-time environment.
- If desired, save the program (both the project file and the form file) to the folder of your choice.
Download the VB project files for the example above here.