Toolbars
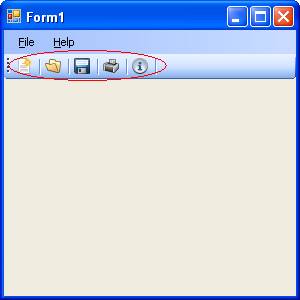
A toolbar provides the user quick access to the most commonly used functions of a program. A toolbar can be used stand-alone or as a complement to the program's menu structure. In this tutorial, we will create a toolbar that complements the menu built in Example 1 of the previous topic. When the sample program runs, it will look like this (the toolbar is circled):
To build the Toolbar Demo sample project, perform the following steps:
|
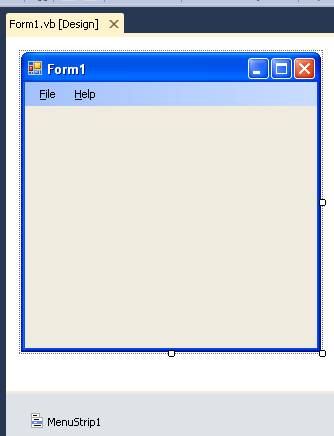
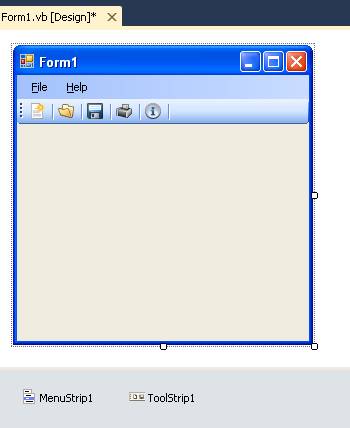
Copy your project files from Example 1 of the previous topic (Menu Demo) into a new folder and open the project. Your form should look like this:
|
|
|
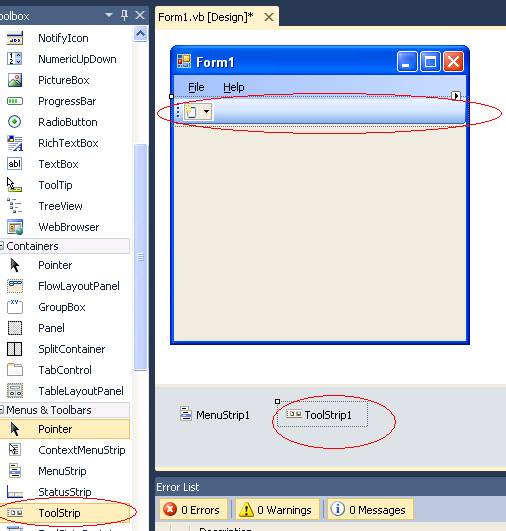
To build a toolbar for use with your VB program, go to the “Menus & Toolbars” section of the toolbox and double-click the ToolStrip control. It will then appear in the component tray below the form, as well as along the top of the form (below the menu in this case), where you can begin to build the visual interface for the toolbar. It starts you off with a drop-down list to select an item to add to the toolbar (in this demo we are concerned with Buttons and Separators).
|
|
|
Click the arrow of the drop-down box and select “Button”. |
|
|
A button with a default picture appears in the toolbar. In this demo, we are concerned with three properties of the toolbar button: (Name), ToolTipText, and Image. Note that a default name of “ToolStripButton1” was given to the button we added. |
|
|
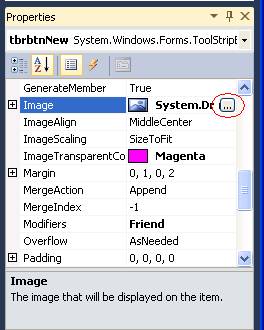
In the Properties window for the toolstrip button, set (Name) to “tbrbtnNew”, set ToolTipText to “New”, and then move to the Image property and click its ellipsis (…) button: |
|
|
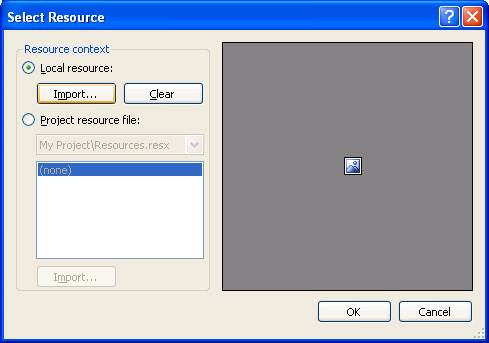
The ellipsis button of the Image property brings up the “Select Resource” dialog box. With the “Local resource” radio button checked, click the “Import…” button. |
|
|
A Windows “Open” dialog box will open, where you will navigate to the location of the desired image for the button. (Note: If you do not have a suitable icon set on your system, there are numerous sites on the Internet, both free and for a cost, where icon sets can be obtained. The five icons used in this demo are available in the download for this project’s files.)
Here, an icon for “New” is selected. Once selected, click the “Open” button. |
|
|
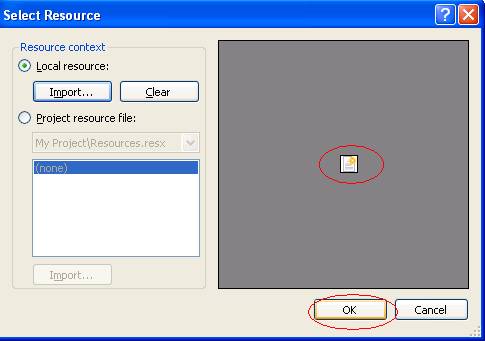
We are now back to the “Select Resource” dialog, where the selected image now appears (as a confirmation of the image you selected). Click the OK button to dismiss this dialog. |
|
|
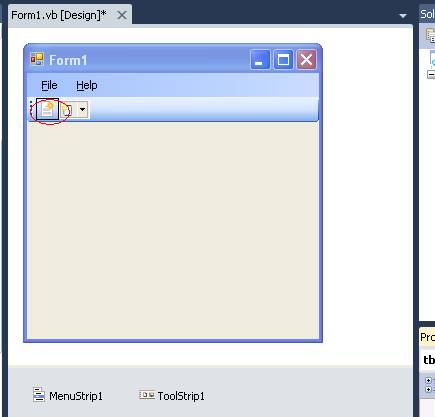
The selected image now appears in the first toolstrip button. |
|
|
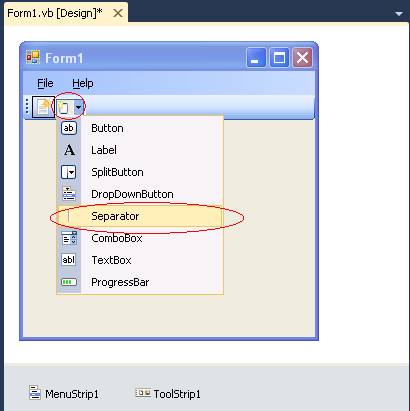
Next, we want insert a separator. Select “Separator” from the drop-down box for the next item to be added to the toolstrip. |
|
|
We now want to repeat this process four more times to add the remaining buttons with following separators:
Your form should look something like the screen shot on the right. |
|
|
We are now ready for coding. Add the code for the toolstrips’s ItemClicked event as shown on the right. This code determines which of the five toolstrip buttons were clicked and then executes the Click event (via the PerformClick method) for the corresponding menu item. |
Private Sub ToolStrip1_ItemClicked(ByVal sender As System.Object, _ ByVal e As System.Windows.Forms.ToolStripItemClickedEventArgs) _ Handles ToolStrip1.ItemClicked
Select Case e.ClickedItem.Name
Case "tbrbtnNew" mnuFileNew.PerformClick()
Case "tbrbtnOpen" mnuFileOpen.PerformClick()
Case "tbrbtnSave" mnuFileSave.PerformClick()
Case "tbrbtnPrint" mnuFilePrint.PerformClick()
Case "tbrbtnAbout" mnuHelpAbout.PerformClick()
End Select
End Sub
|
|
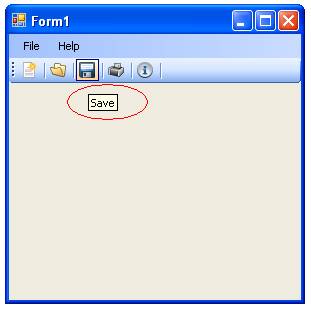
Run the program. As you hover your mouse over a button, you should see the tooltip text that you added. |
|
|
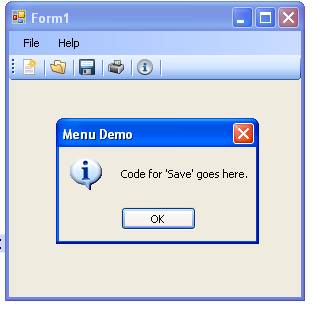
Clicking on a toolstrip button will execute the Click event of the corresponding menu item. |
|


Download the project files for this sample application here.