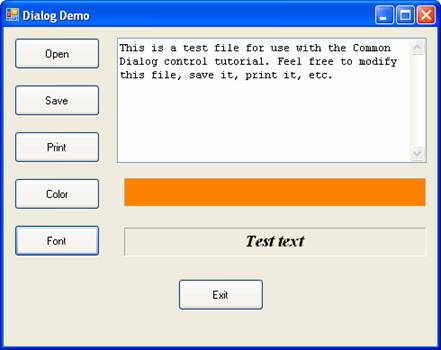
Dialog Controls
Dialog controls provide a standard set of dialog boxes for operations such as opening, saving, and printing files, as well as selecting colors and fonts.
|
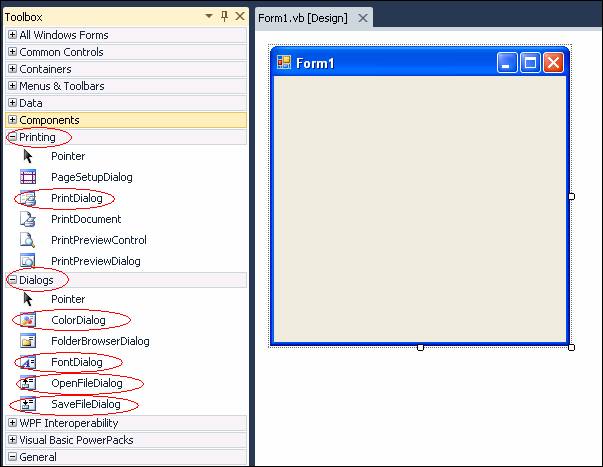
VB provides dialog controls for several functions, five of which will be explored in this demo program. The OpenFileDialog, SaveFileDialog, ColorDialog, and FontDialog controls can be found in the “Dialogs” section of the toolbox; the PrintDialog control can be found in the “Printing” section of the toolbox. |
|
|
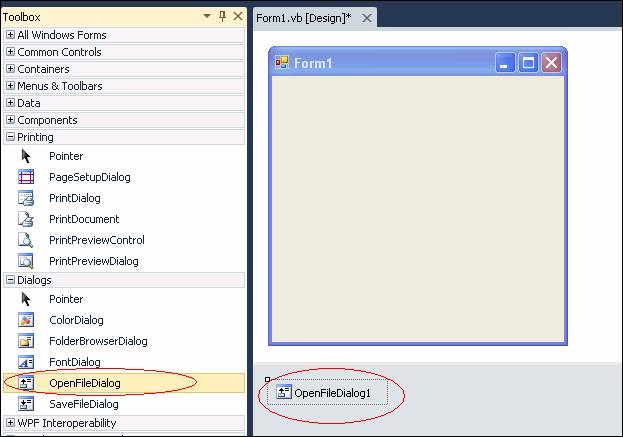
To use a dialog control in your VB program, double-click the desired control in the toolbox. It will then appear in the component tray below your form. Dialog controls are not visible at run-time. |
|
Certain functionality for the dialog controls is provided automatically by VB and Windows, but other functionality must be coded. For example, with the Open and Save dialog boxes, the functionality to navigate to different drives and directories is built in, but the functionality to actually save or open a file must be coded in your program.
To build the Dialog demo program, follow the steps below:
|
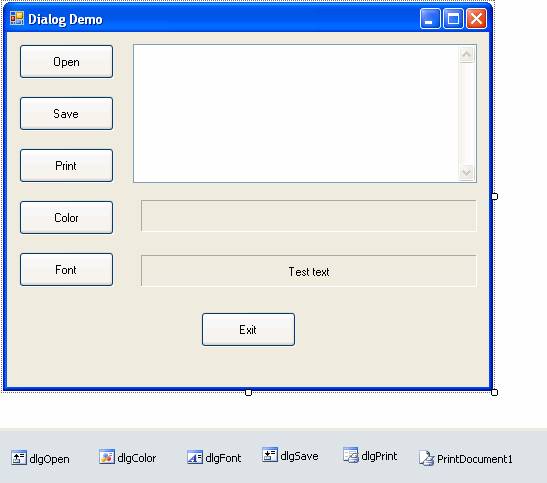
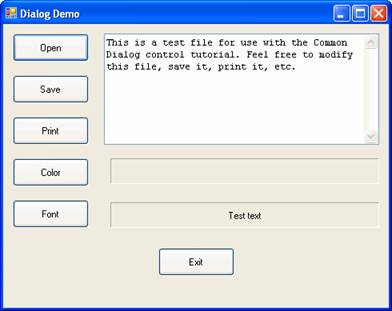
Start a new VB project. Name the default form frmDialogDemo and set the Text to “Dialog Demo”. Add the following controls to the form:
|
|
||
|
At this point, we can start coding. Two form-level String variables, mstrLastDir and mstrCurrentFile are declared. This mstrLastDir variable is used to store the directory of the last file accessed by an Open or Save operation, so it can be subsequently used as the default directory for the next Open or Save operation. It is initialized to My.Application.Info.DirectoryPath, which is the directory from which the program is running. Similarly, the mstrCurrentFile variable is used to store the name of last file opened so that it can be suggested as the name of the file to save in a subsequent Save operation.
|
Public Class frmDialogDemo
Private mstrLastDir As String = My.Application.Info.DirectoryPath Private mstrCurrentFile As String = ""
|
||
|
The btnOpen_Click Event |
|||
|
This event fires when the user clicks the Open button. Note that the variable intDialogResult is declared as Windows.Forms.DialogResult. DialogResult is a built-in enumeration that contains values to be compared against the return value of the ShowDialog method. This enables you to test which button the user clicked to exit the dialog (such as “OK”, “Cancel”, etc.).
The InitialDirectory property tells the dialog where to start its navigation of the file system. As discussed above, we are using the form-level variable mstrLastDir to value this property.
The Filter property is a pipe-delimited string specifying what types of files should be shown in the file list portion of the dialog. The Filter string specifies a list of file filters that are displayed in the Files of type drop-down box. The Filter property string has the following format: description1 | filter1 | description2 | filter2... Description is the string displayed in the list box — for example, "Text Files (*.txt)." Filter is the actual file filter — for example, "*.txt." Each description | filter set must be separated by a pipe symbol (|).
The FileName property is initially set to "" so that a filename is not pre-selected when the dialog box is displayed (if we wanted to, we could initialize it with a default filename). After the dialog has been shown and the user has interacted with it, we use the FileName property to determine what file the user has selected.
The ShowDialog method displays the dialog. At this point, processing will pause until the user either selects a file to open and clicks OK (the actual button is labeled “Open”), or clicks Cancel. Note that the result of ShowDialog is being assigned to the variable intDialogResult and is being used in an If statement to see if the user clicked OK.
Assuming the user selects a file and clicks OK, the FileName property, which now contains the full path and filename of the file that the user selected, is assigned to the local variable strFileToOpen. The file is then opened, loaded into the mutli-line textbox, and closed. The mstrLastDir variable is reset to reflect the path of the file that the user had selected; and the mstrCurrentFile variable is reset to reflect the filename (without the directory) of the selected file.
|
Private Sub btnOpen_Click(ByVal sender As System.Object, ByVal e As System.EventArgs) _ Handles btnOpen.Click
Dim intDialogResult As Windows.Forms.DialogResult Dim strFileToOpen As String Dim intFileNbr As Integer
With dlgOpen .InitialDirectory = mstrLastDir .Filter = "Text Files(*.txt)|*.txt|All Files(*.*)|*.*" .FileName = "" intDialogResult = .ShowDialog() If intDialogResult = Windows.Forms.DialogResult.OK Then strFileToOpen = .FileName intFileNbr = FreeFile() FileOpen(intFileNbr, strFileToOpen, OpenMode.Input) txtTestFile.Text = InputString(intFileNbr, LOF(intFileNbr)) FileClose(intFileNbr) mstrLastDir = Strings.Left(strFileToOpen, IStrRev(strFileToOpen, "\") - 1) mstrCurrentFile = Mid(strFileToOpen, InStrRev(strFileToOpen, "\") + 1) End If End With
End Sub
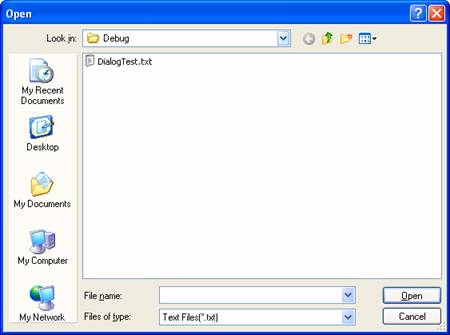
When the code runs, the OpenFileDialog displays as shown below:
After the user clicks “Open” (OK), the file is loaded into the textbox on the main form:
|
||
|
The btnSave_Click Event |
|||
|
This event fires when the user clicks the Save button. In this demo application, the contents of the multi-line textbox will be saved to filename specified. The code for this event procedure is very similar to that of the btnOpen_Click event, with the obvious difference that we are writing out a file rather than reading one in.
The OverwritePrompt property, when set to True, causes the dialog to automatically prompt the user for confirmation if they attempt to save a file that already exists. The CheckPathExists property, when set to True, causes a warning message is displayed if the user enters an invalid path. The Filter property is used as discussed above. The InitialDirectory is set to the name of the directory of the currently open file so that it can be presented as the default; likewise, the FileName is set to the name of the currently open file so it can be presented as the default.
Assuming the user selects a file and clicks OK, the FileName property, which now contains the full path and filename of the file that the user selected, is assigned to the local variable strFileToSave. The file is then opened for output, written out via the PrintLine statement, and closed. As with the Open routine, the mstrLastDir variable is reset to reflect the path of the file that the user had selected; and the mstrCurrentFile variable is reset to reflect the filename (without the directory) of the selected file.
|
Private Sub btnSave_Click(ByVal sender As System.Object, ByVal e As System.EventArgs) _ Handles btnSave.Click
Dim intDialogResult As Windows.Forms.DialogResult Dim intDemoFileNbr As Integer Dim strFileToSave As String
With dlgSave .OverwritePrompt = True .CheckPathExists = True .Filter = "Text Files(*.txt)|*.txt|All files (*.*)|*.*" .InitialDirectory = mstrLastDir .FileName = mstrCurrentFile intDialogResult = .ShowDialog() If intDialogResult = Windows.Forms.DialogResult.OK Then strFileToSave = .FileName intDemoFileNbr = FreeFile() FileOpen(intDemoFileNbr, strFileToSave, OpenMode.Output) PrintLine(intDemoFileNbr, txtTestFile.Text) FileClose(intDemoFileNbr) mstrLastDir = Strings.Left(strFileToSave, InStrRev(strFileToSave, "\") - 1) mstrCurrentFile = Mid(strFileToSave, InStrRev(strFileToSave, "\") + 1) End If End With
End Sub
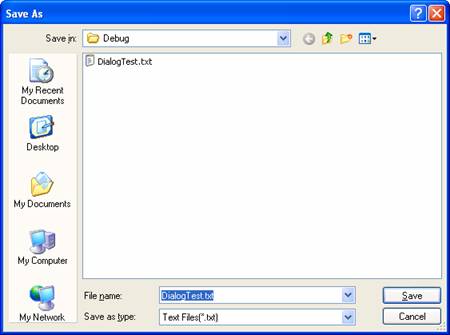
When the code runs, the SaveFileDialog displays as shown below:
|
||
|
The btnPrint_Click Event |
|||
|
This event fires when the user clicks the Print button. Prior to showing the print dialog, the AllowPrintToFile property is set to false, causing the “Print to file” checkbox on the print dialog to be grayed out (this demo program is not supporting a print-to-file operation). After the user clicks OK (the button is actually labeled “Print”), settings for PrinterName, Copies, and Collate are passed from the print dialog to the PrintDocument control, and it is the PrintDocument control that handles the printing of the textbox contents once the Print method is called. The Print method causes the PrintDocument1_PrintPage event to be fired, which handles the printing details. |
Private Sub btnPrint_Click(ByVal sender As System.Object, ByVal e As System.EventArgs) _ Handles btnPrint.Click
Dim intDialogResult As Windows.Forms.DialogResult
With dlgPrint .AllowPrintToFile = False intDialogResult = .ShowDialog If intDialogResult = Windows.Forms.DialogResult.OK Then PrintDocument1.PrinterSettings.PrinterName = .PrinterSettings.PrinterName PrintDocument1.PrinterSettings.Copies = .PrinterSettings.Copies PrintDocument1.PrinterSettings.Collate = .PrinterSettings.Collate PrintDocument1.Print() End If End With
End Sub
Private Sub PrintDocument1_PrintPage(ByVal sender As Object, _ ByVal e As System.Drawing.Printing.PrintPageEventArgs) _ Handles PrintDocument1.PrintPage
Dim numChars As Integer Dim numLines As Integer Dim stringForPage As String Dim strFormat As New StringFormat() Dim PrintFont As Font
Dim strStringToPrint As String = txtTestFile.Text
PrintFont = txtTestFile.Font Dim rectDraw As New RectangleF(e.MarginBounds.Left, e.MarginBounds.Top, _ e.MarginBounds.Width, e.MarginBounds.Height) Dim sizeMeasure As New SizeF(e.MarginBounds.Width, _ e.MarginBounds.Height - PrintFont.GetHeight(e.Graphics)) strFormat.Trimming = StringTrimming.Word e.Graphics.MeasureString(strStringToPrint, PrintFont, sizeMeasure, _ strFormat, numChars, numLines) stringForPage = strStringToPrint.Substring(0, numChars) e.Graphics.DrawString(stringForPage, PrintFont, Brushes.Black, rectDraw, strFormat) If numChars < strStringToPrint.Length Then strStringToPrint = strStringToPrint.Substring(numChars) e.HasMorePages = True Else e.HasMorePages = False End If
End Sub
When the code runs, the SaveFileDialog displays as shown below:
|
||
|
The btnColor_Click Event |
|||
|
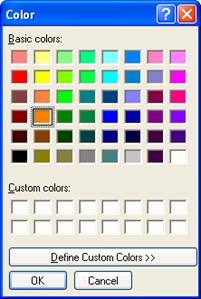
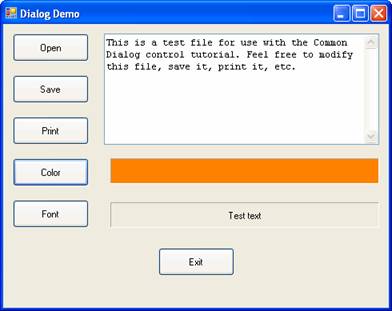
This event fires when the user clicks the Color button. Assuming the user clicks OK, the BackColor of the “lblColor” label is set to the selected color (using the print dialog’s Color property). |
Private Sub btnColor_Click(ByVal sender As System.Object, ByVal e As System.EventArgs) _ Handles btnColor.Click
Dim intDialogResult As Windows.Forms.DialogResult
With dlgColor intDialogResult = .ShowDialog() If intDialogResult = DialogResult.OK Then lblColor.BackColor = .Color End If End With
End Sub
|
||
|
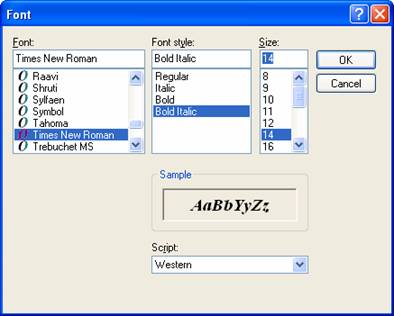
The btnFont_Click Event |
|||
|
This event fires when the user clicks the Font button. Prior to showing the dialog, the ShowEffects property is set to false, which suppresses the display of options on the Font Dialog for superscript, subscript, strikethrough, etc. (this demo program is not supporting those kinds of options). Assuming the user clicks OK, the font Name, Size, and Style properties are used to build a Font object which is assigned to the lblFont label’s Font property. |
Private Sub btnFont_Click(ByVal sender As System.Object, ByVal e As System.EventArgs) _ Handles btnFont.Click
Dim intDialogResult As Windows.Forms.DialogResult
With dlgFont .ShowEffects = False intDialogResult = .ShowDialog() If intDialogResult = Windows.Forms.DialogResult.OK Then lblFont.Font = New Font(.Font.Name, .Font.Size, .Font.Style) End If End With
End Sub
|
||
|
The btnExit_Click Event |
|||
|
The Exit button invokes the Close method of the form and thus ends the program. |
Private Sub btnExit_Click(ByVal sender As System.Object, ByVal e As System.EventArgs) _ Handles btnExit.Click
Me.Close()
End Sub
|
||

Download the project files for this topic here.