Easy Data Access with the BindingNavigator
The BindingNavigator and related controls provide an easy way to browse and update data writing little or no VB code. While I have never been a proponent of using data-bound controls (preferring to use code for data access), it does not hurt to have a working knowledge of data-bound controls and can come in handy for simple, "quick and dirty" data access applications.
This sample application allows the user browse (and update) the Employees table of the modified Northwind Access database (the same database that was used in the Introduction to SQL tutorial). A copy of the database can be downloaded here. To follow along with the steps below, download the database file to your desktop.
This sample application also introduces the TabControl. The TabControl allows you to conserve screen "real estate" by breaking up data to be displayed into logical "pages" (where each tab of the TabControl represents a page).
To build the sample application, follow the steps below:
|
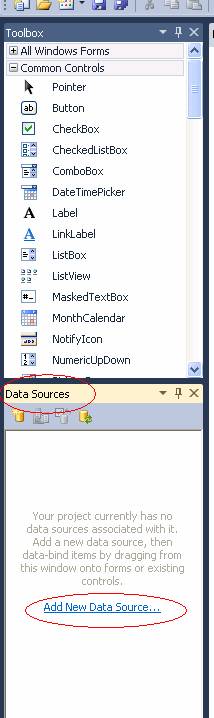
Start a new project. Locate the Data Sources window (should be near the Toolbox) and click on the “Add New Data Source” link. |
|
|
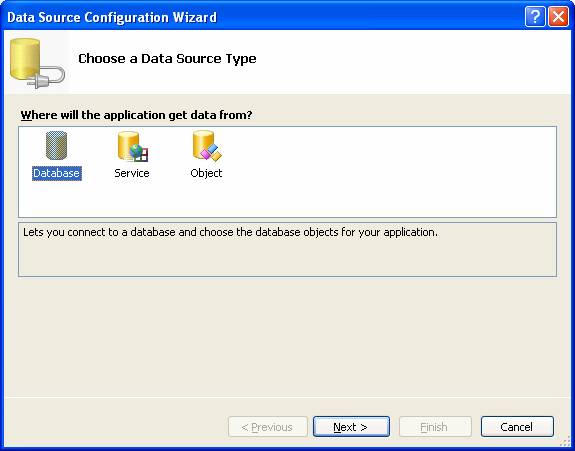
The Data Source Configuration Wizard appears. Select “Database” for “Choose a Data Source Type” and click Next. |
|
|
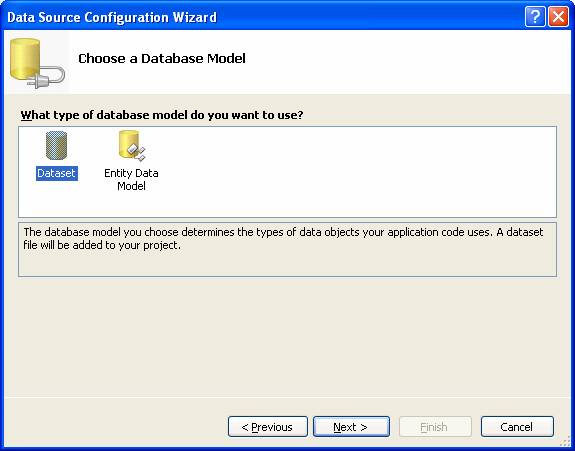
Select “Dataset” for “Choose a Database Model” and click Next. |
|
|
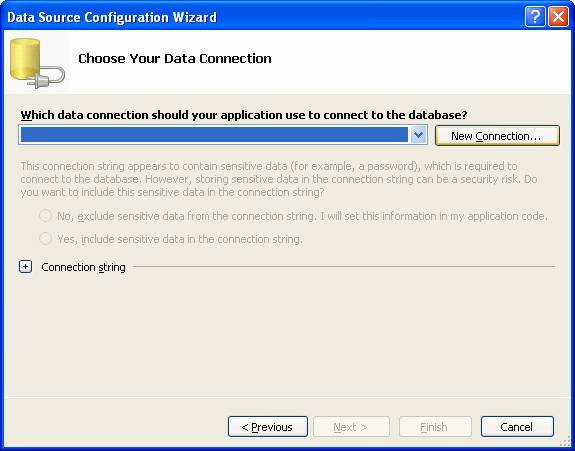
On the “Choose Your Data Connection” screen, click the “New Connection” button. |
|
|
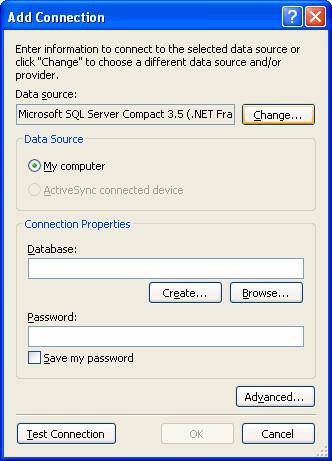
On the “Add Connection” screen, click the “Change” button. |
|
|
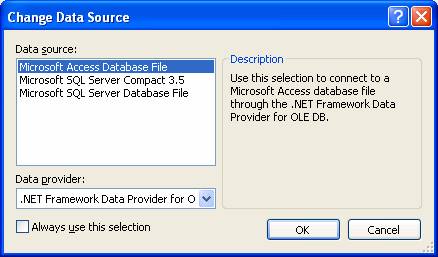
On the “Change Data Source” screen, select “Microsoft Access Database File” for “Data source” and click OK. |
|
|
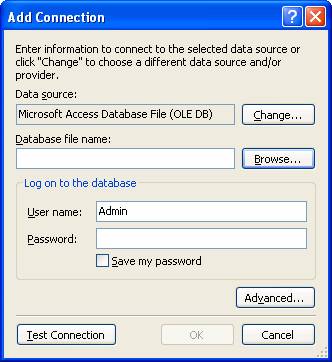
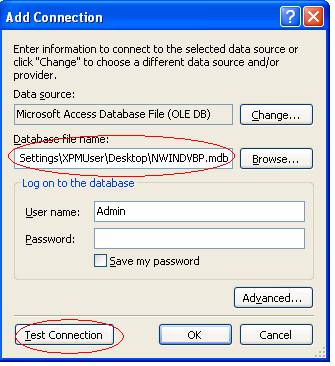
Back on the Add Connection screen, we must supply the name of the Access database file to use. You can click the Browse button to locate the file. |
|
|
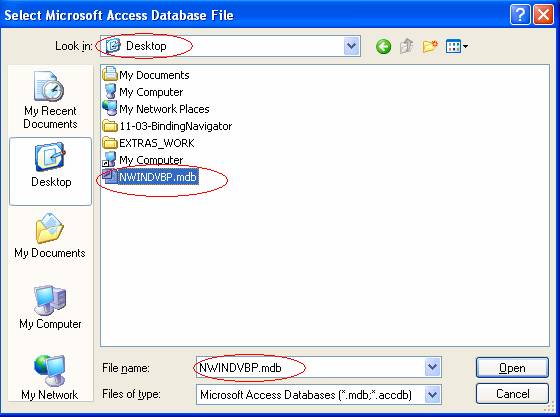
In this case, we want the modified Northwind database that was used in the SQL tutorial. I placed a copy on my desktop, so that is where I have navigated to. Select the NWINDVBP.mdb file and click Open. |
|
|
The selected file should then appear in the “Add Connection” screen. Click the “Test Connection” button. |
|
|
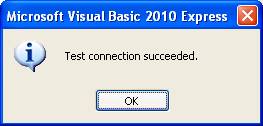
You should get the message that the test connection succeeded. Click OK to this message, then click OK on the Add Connection screen to close that. |
|
|
Back on the Data Source Configuration Wizard screen, the file name should now appear. Click Next. |
|
|
The following message appears. For this sample application, click Yes. |
|
|
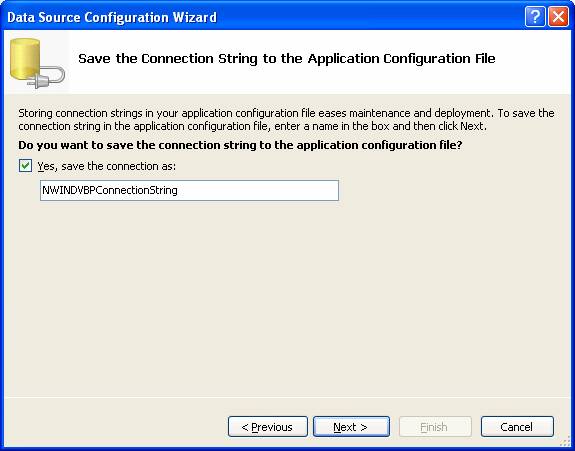
On the “Save the Connection String” screen, accept the defaults and click Next. |
|
|
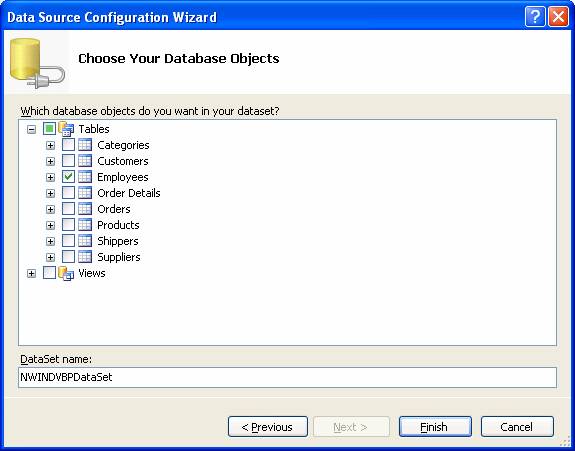
On the “Choose Your Database Objects” screen, check the Employees table and click Finish. |
|
|
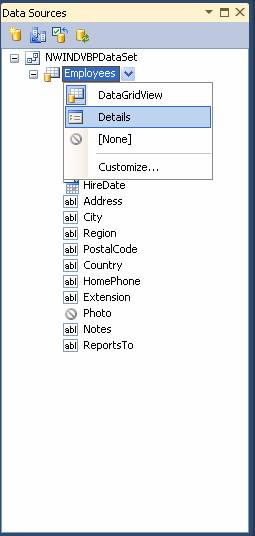
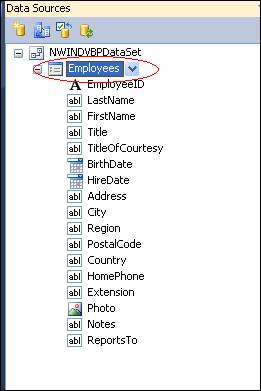
The Employees table should now appear under “NWINDVBPDataSet” in the Data Sources window.
Click on “Employees” so that the drop-down appears, and select “Details”. This will allow us to view the data one record at a time. (The default is “DataGridView”, which we do NOT want for this sample application.) |
|
|
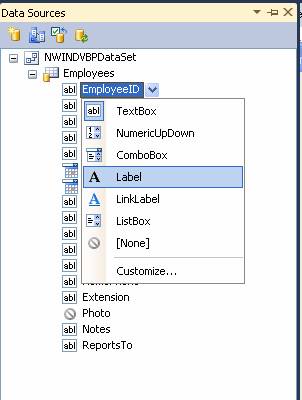
Click on the EmployeeID field and in the drop-down, change its control type to “Label”. |
|
|
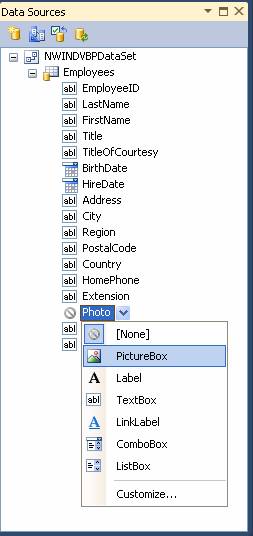
Click on the Photo field, and change its control type to “PictureBox”. |
|
|
Now the “magic” begins. Click on the “Employees” table and DRAG it to the blank form. |
|
|
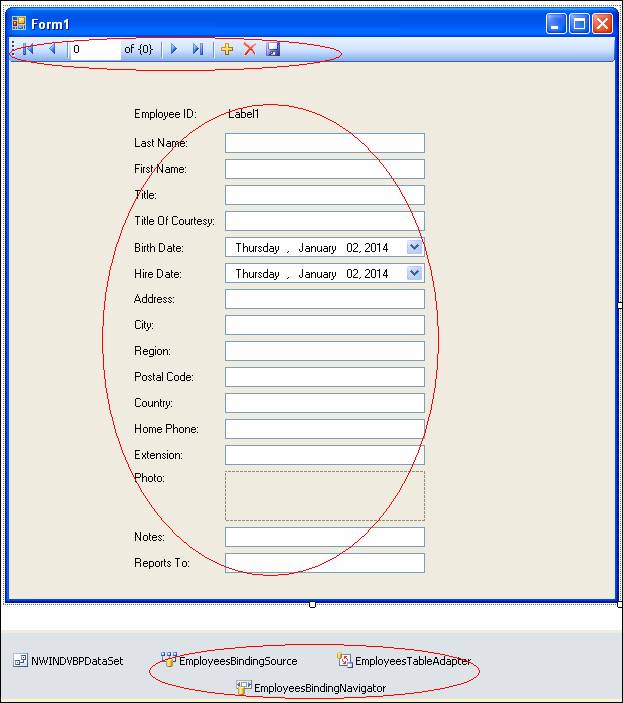
Once you have dragged the Employees table from the dataset to the blank form, several items appear: the BindingNavigator toolbar at the top of the form, a set of controls for each of the table’s fields, and a set of binding related controls in the component tray. |
|
|
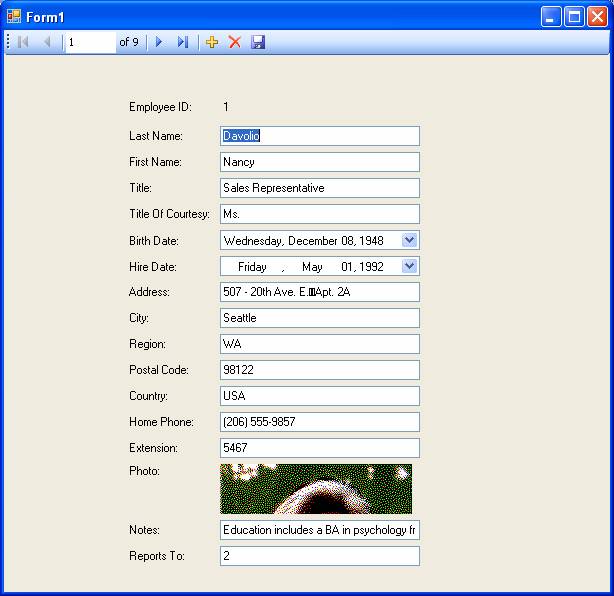
At this point, before we start making changes to clean this up, just to verify that this works, run the program. Note that the data is automatically populated. You can use the navigator bar at the top of the screen to view the next or previous record, as well as to add, delete, or update records. |
|
|
Back in design mode, we will now “dress up” this form to make it more presentable. Make the following changes:
At this point, the form should look something like the screen shot on the right. |
|
|
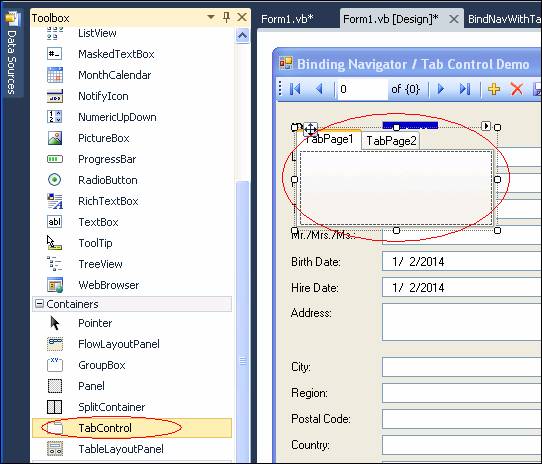
Place a TabControl on the form. The TabControl is located in the ToolBox under “Containers”. Name the TabControl “tabEmployees”. |
|
|
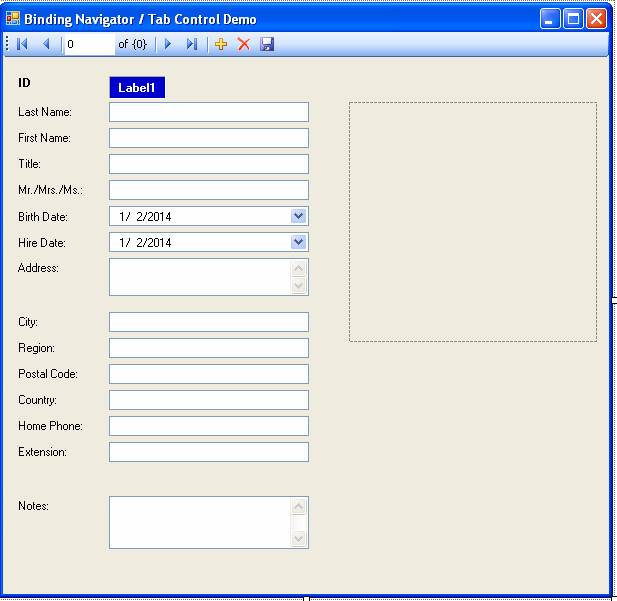
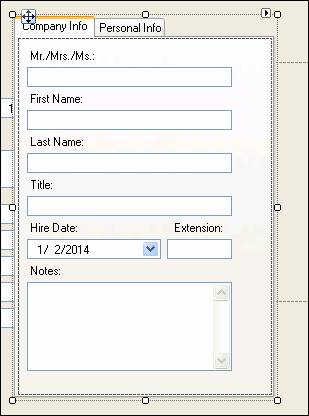
Change the text of TabPage1 to “Company Info” and change the text of TabPage2 to “Personal Info”. Move the Mr./Mrs./Ms. (Title of Courtesy), First Name, Last Name, Title, Hire Date, Extension, and Notes fields into the Company Info tab and arrange them as shown in the screen shot on the right. |
|
|
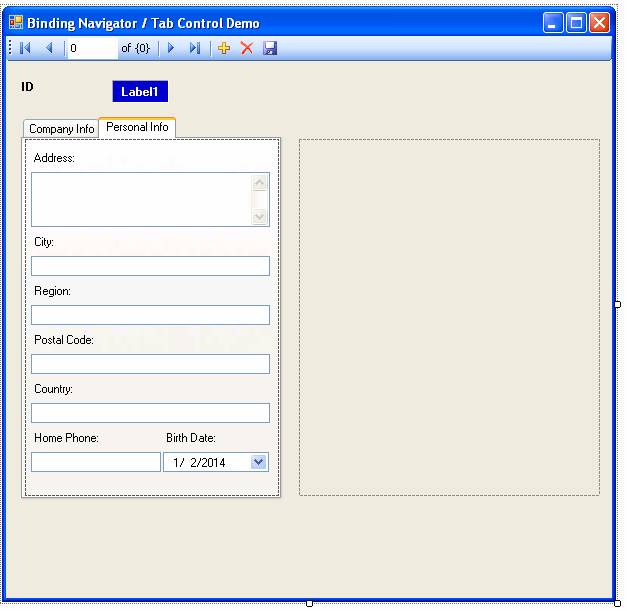
Move the Address, City, Region, Postal Code, Country, Home Phone, and Birth Date fields into the Personal Info tab and arrange them as shown.. Position the TabControl to the left and the PictureBox to the right as shown. |
|
|
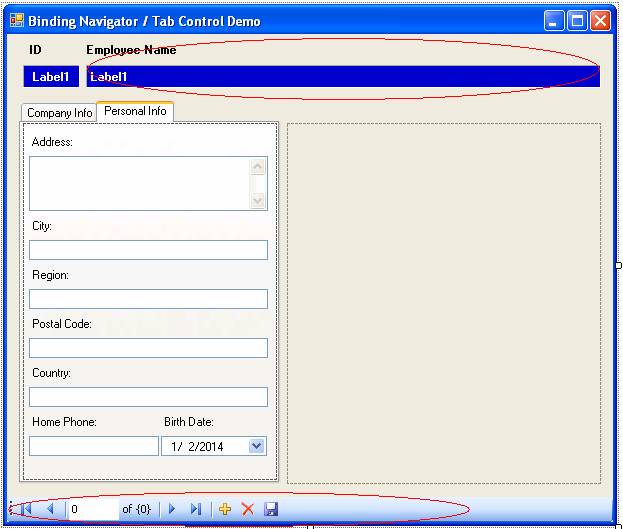
Add a label to the form and call it “lblFullName”, Change its proerties as follows: AutoSize = False, BorderStyle = Fixed3D, Backcolor = MediumBlue, ForeColor = White, TextAlign = MiddleLeft, and make the Font Bold. Add another label with the text “Employee Name” and make its Font Bold.
Change the Dock property of the BindingNavigator to Bottom.
Size and rearrange the form items so that it looks like the screen shot on the right.
|
|
|
Add the code shown on the right for the RefreshItems event of the BindingNavigator.. This will cause the full name of the employee to be displayed in the label we added when the user moves to a new record. The statement “tabEmployees.SelectedIndex = 0“ will force the tab control to make the first page active when the user moves to a new record. |
Private Sub EmployeesBindingNavigator_RefreshItems(ByVal sender As System.Object, _ ByVal e As System.EventArgs) _ Handles EmployeesBindingNavigator.RefreshItems
lblFullName.Text = FirstNameTextBox.Text & " " & LastNameTextBox.Text tabEmployees.SelectedIndex = 0
End Sub
|
|
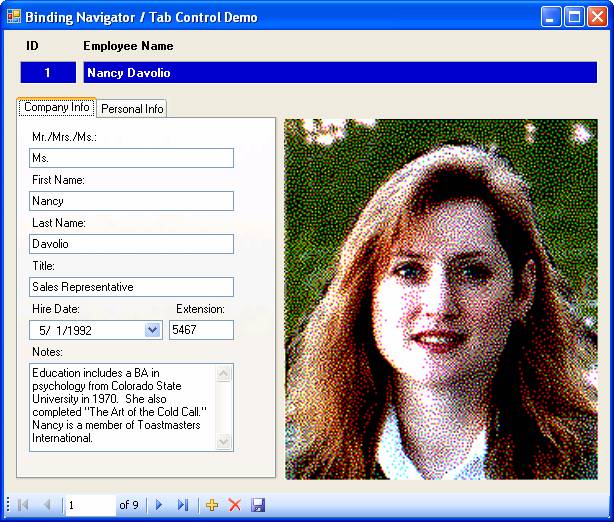
Run the program. The fields should populate as shown. Here, we see the first tab (Company Info) populated. |
|
|
Here, we see the second tab (Personal Info) populated. |
|


Download the project files for this sample application here.